Bread may not be the staple food in every culture, but it certainly is in mine. So when I decided I was going to become more self-sufficient, learning how to make quality bread from scratch was very high up on the priority list.
Bread is awesome for a number of reasons. It’s nutritious and healthy, comes in a variety of different styles and flavors, is relatively easy to make, and is made from ingredients that are cheap and easy to acquire.
Of course, some breads are better than others. Most of the criticism about bread being fattening and unhealthy are due to commercial breadmaking practices and can be totally reversed by making it yourself. People across the world have been eating bread for thousands of years; if it was fundamentally bad for us, we would have figured it out by now.
There is a huge difference between the modern commercial bread in the typical American grocery store and bread made by more traditional methods. I noticed this difference when I came back from living overseas. In Georgia, easily 40% of my diet was bread of some sort, so one of the first foods I bought on my return was a freshly made loaf from the local Smith’s grocery store. It was like eating air. Not only did the bread lack flavor, but it was remarkably unfilling compared to the stuff I’d become accustomed to.
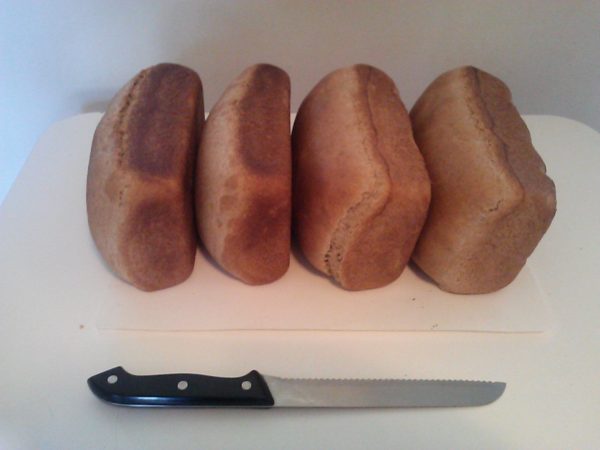
Fortunately, after learning how to grind wheat, I was able to make bread that was just as good—in fact, probably better. Every Sunday, I bake a couple of loaves, freezing one for later (bread freezes extremely well) and using the other immediately. I’ve been baking bread on a regular basis for the last six months, and while I still have a lot to learn, there’s a lot that I can share.
So let’s start with the basic ingredients:
FLOUR
Flour is made from grain that has been ground to a powder. The typical grain for bread is wheat, though you can also make bread from rye, oats, rice, and other kinds of grains.

A wheat kernal consists of three parts: bran, germ, and endosperm. Each one is perfectly edible. The bran is the outer shell, the germ is the embryo, and the endosperm is a nutritional package for the plant. If you compare it to a spaceship, the bran is like the hull, the germ is like the living quarters for the crew, and the endosperm is like the rocket fuel.
Whole wheat flour has the germ and the bran, but in white or all-purpose flour, those have been removed. Since the endosperm has very little fiber and is almost all carbs, bread made from this kind of flour is significantly less healthy and less filling. However, all-purpose flour tends to make bread sweeter (again, because of the carbs), so it’s okay to mix a little of it into your dough. But I wouldn’t want to eat a loaf made entirely from all-purpose flour.
When stored in proper conditions, whole wheat will last basically forever. To return to the spaceship analogy, each grain of wheat is like a tiny colony ship with the colonists frozen in cryo, just waiting to arrive at their new homeworld. As long as the hull doesn’t breach, everything’s pretty much good.
For this reason, wheat is perfect for long-term food storage. All you need is some way to grind it into flour, which you can then use to make bread at your leisure. The grinder I use is an old Magic Mill Plus III that I inherited from my parents. The thing is older than I am and sounds like a freaking jet engine when it’s running, but it gets the job done (some day, I’m going to build a pedal-powered wheat grinder that you can hook up to your bicycle, but that’ll deserve a whole post unto itself).
There are a lot of different varieties of whole wheat, but for our purposes, there are basically two:
- Red wheat is denser and more flavorful, with a strong, hearty flavor.
- White wheat is softer and lighter, with a less overpowering flavor.
There are other distinctions, such as hard wheat vs. soft wheat, winter wheat vs. spring wheat, etc, but I haven’t experienced any significant difference between those. The main distinctions I’ve found to be significant have been between whole red wheat, whole white wheat, and all-purpose flour.
WATER
Next to wheat, water is the most significant ingredient in the bread making process. It is entirely possible to make edible, nutritious bread from nothing but flour and water (including leavened bread, but more on that later).
To make good bread, it’s important to have the right consistency of moisture. Dough that is too dry will make a hard, dense bread that dries out and goes stale very quickly. Dough that is too wet will not hold its shape very well, which isn’t much of a problem for sandwhich loaves but can be a problem for artisan bread. Generally, though, it’s best to err on the wet side.
Dough that is the right consistency will be sticky, but not too sticky. Basically, it will cling to your hands and the table but not so much to make them super messy. Most homemaking blogs describe this consistency as “silky,” which makes no sense to me, since I have no desire to either eat silk or wear bread dough. Then again, I’m a man.
In order to preserve moisture, it is entirely possible to knead with water instead of flour. I picked up this technique from Melissa Richardson of The Bread Geek (and author of The Art of Baking with Natural Yeast, which I highly recommend). You basically wet your hands, run them over the dough, and knead as per usual. The water forms a lubricating layer which prevents the dough from sticking to your hands or the table. Just be sure not to let the dough sit for too long on the table, because it will start to stick.
YEAST
Leavening is the process by which little air bubbles are injected into the dough, making it light and spongey. If you don’t use a leavening agent of some kind, you’ll end up with crackers instead of bread (or worse, a solid brick). While it’s possible to leaven bread with baking powder or baking soda, the most common leavening agent is yeast.
Yeast is a single-celled fungi that turns sugars into ethanol and carbon dioxide through a process known as fermentation. When brewing alcohol, the ethanol mixes into the drink and the carbon dioxide dissipates into the air. When baking bread, the carbon dioxide is trapped in the dough to form air bubbles and the ethanol dissipates in the baking process.
This is where things get interesting. If you’re like me when I first started baking bread, you probably think of yeast as a packet of powdery brown stuff that you buy at the grocery store. But people have been baking bread for thousands of years. Where did they get their yeast before they had those little packets? And how can we be truly self-sufficient if we have to go to the grocery store every couple of months to get our yeast?
Commercial quick rising yeasts are a relatively new invention. The yeast you buy in the grocery store is a single isolated variety produced in a laboratory and optimized for just one thing: making bread rise quickly. But before commercial yeast, people used yeasts that they cultivated themselves—and these traditional yeast cultures do much, much more.
In a natural yeast culture, multiple varieties of yeast coexist symbiotically with a probiotic known as lactobaccilus. The lactobaccili promotes a mildly acidic environment which keeps out mold and allows the yeast to thrive. This environment also simulates the soil, neutralizing phytic acids in the wheat that bind up most of the nutrients—essentially tricking the wheat into thinking that it’s been planted. In addition, the yeast consumes many of the sugars that give the bread such a high glycemic index, and partially digests the gluten to make it more digestible for humans.

This natural yeast, also known as sourdough starter, makes for a bread that is healthier, tastier, more nutritious, and much more self-sufficient. You can use it to make almost any kind of bread, including breads that are mild and not sour. And to make your own culture, all you need is flour and water.
Wait—all you need is flour and water? But where does the yeast come from?
The thing about yeast is that it’s everywhere: in the air, on your skin, and on the skins of fruits and grains. The type of yeast that’s best for fermenting any kind of plant can typically be found on that plant. Thus, to make wine, you crush grapes and yet the yeast on the skin of the grapes ferment the juice. For bread, you essentially do the same thing: use the yeast found on the outside of the grain to ferment the dough you make from it.
To make your own sourdough starter, it’s best to start with whole wheat or rye flour, since those contain more yeasts. After that, you can also use all-purpose flour so long as it’s unbleached. Since chlorine can also kill yeast, it’s important to use water that isn’t chlorinated. You can do this either by buying bottled mineral water, or by letting a pitcher of tap water sit on the counter for at least 24 hours to let the chlorine dissipate.
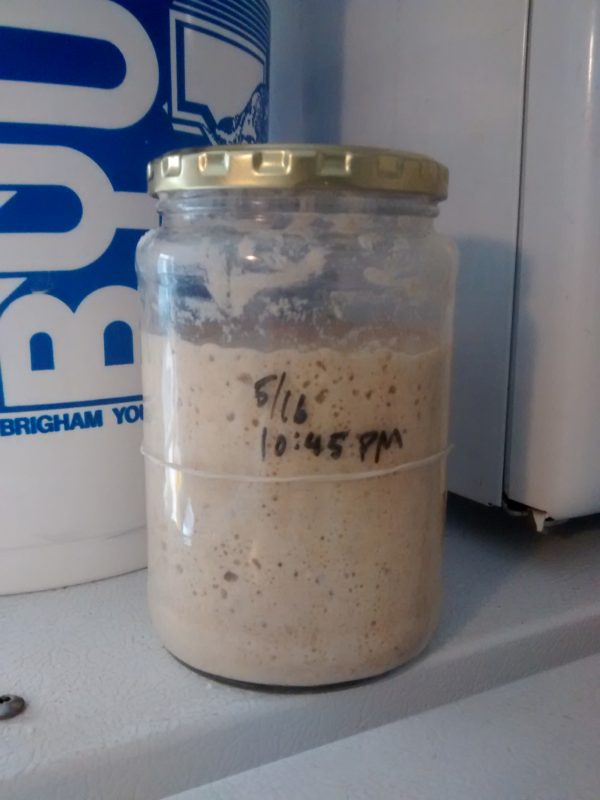
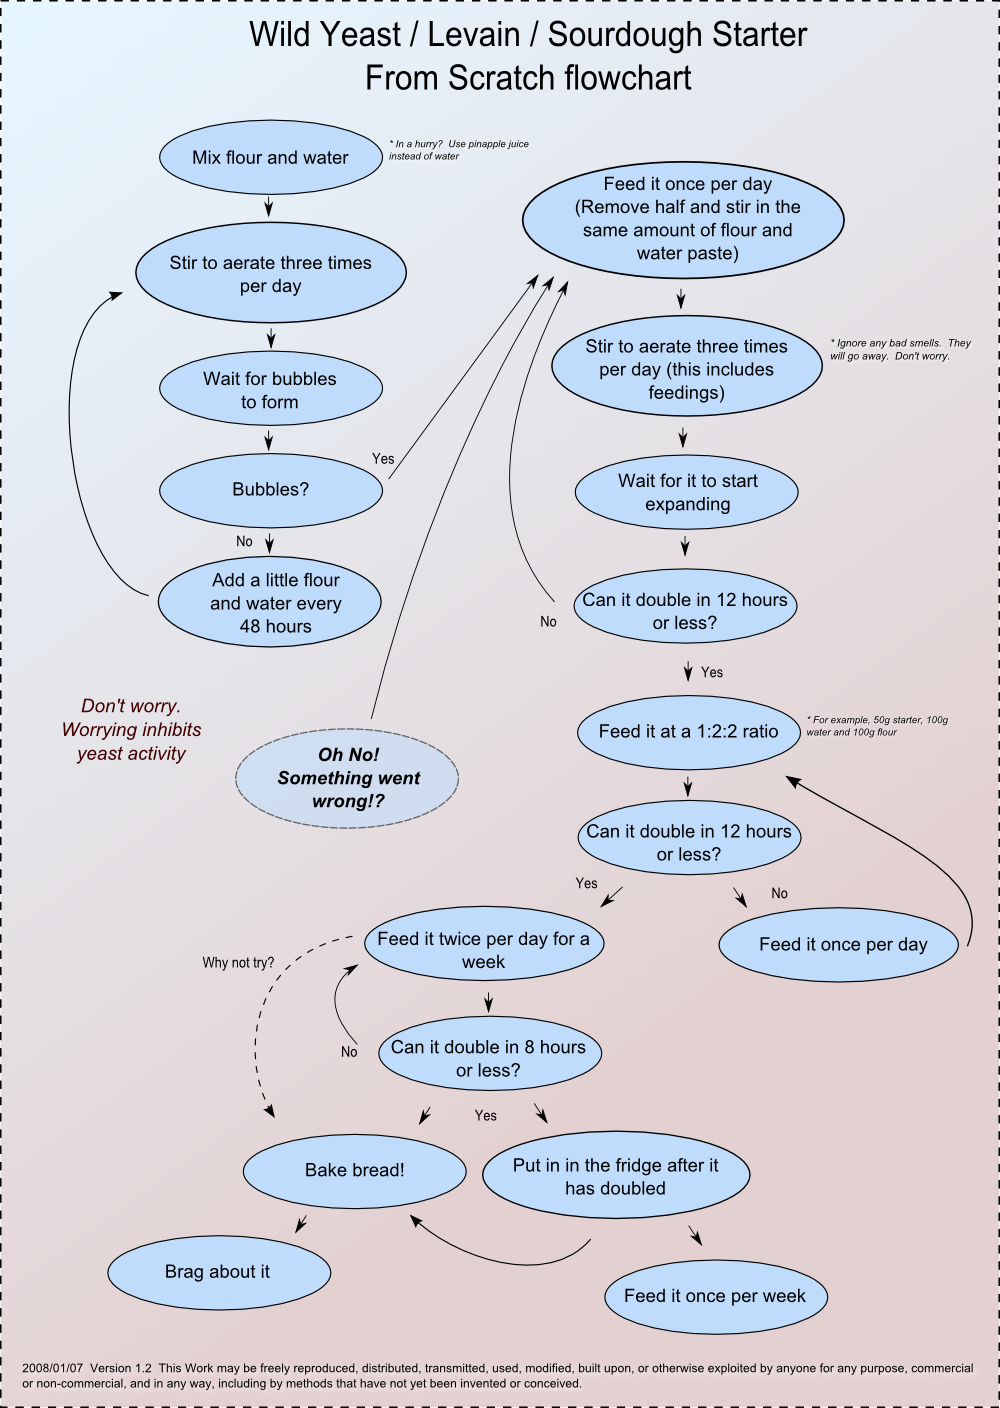
 If you want to make your own sourdough starter, this chart shows the way to do it. For my starter, I just mixed flour, water, and starter at a 1:1:1 ratio every 24 hours, and at the end of the week, it was doubling in less than 8 hours. I’ve been baking bread with it ever since.
Sourdough starter can be kept on the counter at room temperature or in the fridge. A healthy culture will maintain itself, so as long as you feed it regularly, it shouldn’t go bad. Even if you neglect it for long periods of time, you may still be able to revive it. The only sure thing that will kill yeast is an oven, which is why in Alaska they call you a “sourdough” if you’ve lived there for at least a year.
Every starter culture has its own idiosyncracies, so you’ll have to play around with your own to get a feel for it. In general, though, sourdough starter follows this life cycle:
- STAGE 0: Yeast has not yet consumed the flour. Bubbles are starting to form but dough has not yet doubled in size. Time on counter: 0-4 hours. Time in fridge: 0-1 days.
- STAGE 1: Yeast population multiplies exponentially, overtaking the bacteria. Dough doubles in size and has a mild taste. Time on counter: 4-8 hours. Time in fridge: 1-3 days.
- STAGE 2: Yeast population stabilizes and bacteria population begins to overtake it. Sourness increases by the hour. Time on counter: 8-24 hours. Time in fridge: 3-7 days.
- STAGE 3: Yeast begins to starve. A layer of clear alcoholic liquid, known as hooch, appears on surface. Bacteria surpasses yeast and makes dough too sour to be usable. Time on counter: 24+ hours. Time in fridge: 7+ days.
The key ingredient with sourdough starter is time. To make a milder tasting bread, shape the loaves immediately after kneading and let rise only 4-6 hours (or until they just double in size). To make a more sour tasting bread, let the dough rise longer.
It is entirely possible to make good, nutritious bread from nothing but flour and water (in fact, that is how most artisan breads are made). However, you will probably want to add more ingredients in order to improve the taste and texture. Here are some of the other common ingredients that can go into bread.
SALT
Salt is a flavor enhancer: it basically amplifies whatever flavors are already in your bread. It also kills yeast, however, so adding too much will make it harder for your bread to rise. Most bread recipes typically call for no more than a teaspoon.
SUGAR
Sugar makes bread sweeter and can make the yeast grow faster. It also helps the bread retain moisture. When I bake bread, I typically use about half a cup of white or brown sugar for two loaves.
I have read somewhere that with sourdough starter, sugar is completely consumed by the yeast and does not of itself make the bread any sweeter. I have not found that to be the case. My first test loaf with sourdough starter was made without any sugar, and the second test loaf was. The first loaf was too sour, but the second one was sweeter and more palatable. If the sugar had been completely consumed, the second loaf should have been more sour because it would have accelerated the yeast’s life cycle.
The yeast in a sourdough culture is optimized to eat whatever it is that you feed it most regularly. If you feed it mostly flour, then it will be optimized to eat flour, not sugar. If you switch to feeding it rye, then the rye-consuming yeasts will overtake the wheat-consuming yeasts and over time your starter will be optimized for rye. This is why it’s kind of pointless to make sourdough starter from grapes or raisins. The yeast on grapes is not optimized for flour, and will be overtaken anyway once you start feeding it flour, so you might as well just use the flour to begin with.
Bottom line, sugar makes bread sweeter.
MILK
In most bread recipes, you can substitute a portion of the water for milk. This will make the bread softer and lighter, just like adding milk to an omelette will make it softer and lighter.
You can also glaze the top of your bread with milk immediately before you bake it. This will make the crust darker and give it more flavor. You can use other things to glaze your bread, but I prefer milk because it browns the crust only slightly without making it too thick.
EGGS
In generally, eggs help baked goods to hold together better. If you’re having problems with your bread getting too crumbly or falling apart, one way to solve that would be to add an egg.
Like milk, eggs can also be used for glazing. The yolks thicken the crust and give it a golden color, while the whites give it a shiny sheen.
BUTTER/OIL
Fats and oils lubricate the gluten in bread, making for shorter gluten chains (hence the word “shortening”). In practice, this means that bread made with oils or fats will be softer and lighter, with smaller, more uniform air bubbles. Breads made without fat, such as French bread, will be tougher and chewier with large air bubbles. Use enough fat, and you’ll end up with cake instead of bread.
Butter is a special case because its melting point is roughly body temperature. This means that butter enhances texture, since it melts in your mouth when you eat it. Butter can also be used to glaze your bread both before and after baking. For that reason, butter is the most convenient way to glaze bread.
For sandwich loaves, I prefer to use olive oil because of the flavor it imparts. Olive oil has a very distinctive flavor that translates quite nicely into finished bread. It’s more of a savory flavor, though, so for sweet breads, I prefer to use butter.
I try to avoid unnatural oils like margarine, shortening, and vegetable oil. I don’t have any proof that they’re bad for you, but I just don’t trust them. Besides, they don’t taste nearly as good as natural fats like butter, lard, and olive oil.
So much for the ingredients. Now let’s move on to the basic breadmaking techniques:
SIFTING
When flour sits in a container for a long time, it tends to settle and become dense. Sifting helps to lighten the flour by mixing air in with it, making it easier for the flour to mix with other ingredients.
An easy way to sift your flour is to mix all your dry ingredients in a separate bowl from the wet ingredients and mix it all together with your hand. Get a feel for the flour and stir it until it’s at the consistency that you want.
If you do not sift your flour before mixing it with the wet ingredients, your bread will be denser and less uniform. So sifting is definitely a good idea.
KNEADING
Kneading is a process of stretching and folding that gives bread its texture. It takes a lot of effort to do it by hand, but it’s worth it, since bread that isn’t kneaded properly will crumble and fall apart.
Gluten forms when glutenin and gliadin proteins in the flour cross each other, forming long chains. These gluten chains form the matrix that traps the air bubbles and allows the bread to rise. Longer chains can trap more air and hold your bread together, making it stronger and less crumbly.
The way to know when your dough has been kneaded enough is to run it through the windowpane test. Stretch a small bit of dough between your fingers and see how thin you can stretch it before it breaks. If you can stretch it thin enough to see light through the other side, your dough has been kneaded enough.
If you’re kneading by hand, it’s almost impossible to overdo it, so I knead all my dough for at least ten minutes. After a while, you get a pretty good feel for it, so that you can tell when the dough is ready just by handling it.
SHAPING
Shaping loaves can be tricky. If you’re not careful, you can end up with massive pockets of air inside your loaf. It can be a real pain.
I used to shape my loaves by flattening the dough out and rolling it up, but I ended up with some massive pockets that way, so I don’t do it that way anymore. Instead, I form a ball with the dough and roll it around for a minute or two to make sure that it’s uniform. Then, I stretch the edges of the ball out and roll it lengthwise to give it the proper shape.
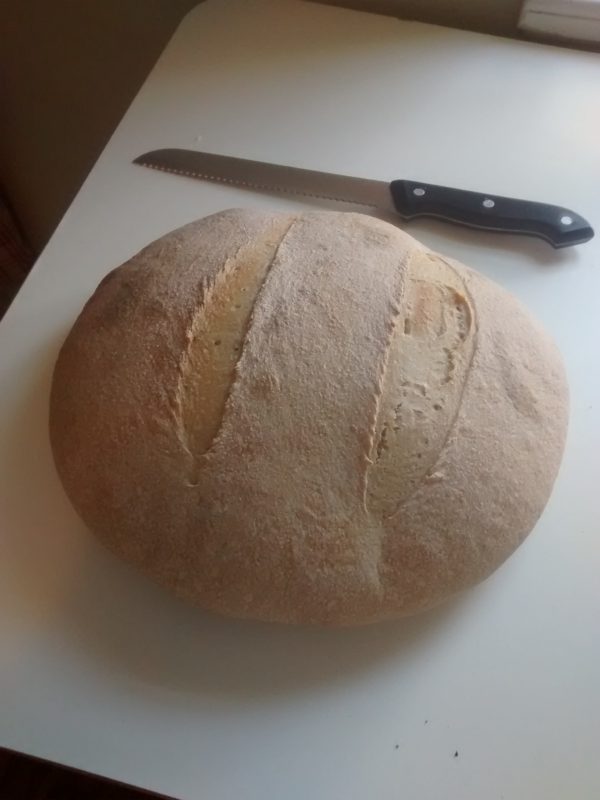
Artisinal breads call for different shaping techniques. They may also call for scoring the surface of the bread immediately before baking. Since yeast multiplies rapidly just before it dies, bread tends to expand in the first few minutes of the baking process. Scoring it helps to control where it expands, so that you don’t get a misshapen loaf.
BAKING
The baking process is pretty straightforward: set your oven to a certain temperature and put the bread in the oven for a set amount of time. Different recipes call for different times and temperatures, though, so its important to pay attention to that.
I’ve found that most breads do well at 350° F for 30-35 minutes. Flatbreads such as pita need a much shorter baking time as well as a higher temperature, since they aren’t nearly as thick and have a larger evaporative surface. Some breads like scones, tortillas, and English muffins are made on a stovetop and not an oven. However, the same general rules apply: thicker breads need to cook longer at lower temperatures than thinner flatbreads.
To make bread with a thick crust, add an oven-safe bowl or container with a couple of inches of water inside of it. This generates steam inside your oven, which significantly boosts the crust.
It’s also important to allow your bread time to cool off before you cut into it. This is because the steam inside of the bread still bakes it after you’ve removed it from the oven. Cutting into a loaf of bread too soon will make the inside sticky, and cause it to dry out faster.

That is pretty much everything I know about making bread. There’s a bit of a learning curve, but it is definitely worth it.
Learning how to bake my own bread allowed me to cut my monthly food budget by at least 25%. Wheat is incredibly cheap (only $7 for 25 lbs at the LDS Home Storage Center—that’s enough to last me about three or four months), and whole wheat bread is significantly more filling than the white stuff. Also, the taste of homemade bread is AMAZING. I cannot go back to the bread in the store—the homemade stuff is just too good.
Better, healthier, more filling food at a fraction of the cost—that’s what it means to be self-sufficient with bread. I’ll leave you with my basic recipe:
BASIC WHOLE WHEAT BREAD
2-3 cups sourdough starter
2-3 cups warm water
.5 cup sugar
.25 cup olive oil
3-4 cups white wheat flour
3-4 cups red wheat flour
.5 tbsp salt
- Sift 6 cups flour and salt in a large mixing bowl. Leave some flour aside for kneading.
- Mix starter, water, sugar, and oil. Add to dry ingredients to form dough.
- Knead for at least ten minutes, adding flour until consistency is slightly sticky.
- Shape loaves and place in greased bread pans. Allow 4-8 hours to rise.
- Bake at 350° F for 35 minutes. Glaze with butter and set aside to cool.
For mild bread, bake as soon as loaves double in size. For sour bread, allow more rise time.